When it comes to producing flawless embroidery, Digitizing For Embroidery is the skill that separates beginners from true professionals. As embroidery businesses grow and designs become more detailed, basic digitizing methods simply aren’t enough. Advanced digitizing techniques help professionals control stitch behavior, improve fabric performance, reduce production errors, and deliver premium-quality results every time.
In this detailed guide, we’ll break down advanced digitizing for embroidery techniques that experienced digitizers and embroidery professionals use to achieve clean stitching, sharp details, and consistent outcomes across all machine formats and fabrics.
Why Advanced Digitizing Matters in Professional Embroidery
Professional embroidery isn’t just about converting artwork into stitches. It’s about understanding how thread, fabric, tension, and stitch direction work together. Advanced digitizing allows you to:
- Prevent fabric distortion and puckering
- Improve stitch coverage and clarity
- Reduce thread breaks and trims
- Optimize stitch paths for faster production
- Maintain logo accuracy across different garments
For professionals handling commercial orders, these improvements save time, reduce waste, and increase client satisfaction.
Mastering Stitch Direction and Stitch Flow
Controlling Stitch Direction
One of the most powerful advanced techniques is controlling stitch direction intentionally. Stitch direction affects how light reflects on the embroidery, how fabric pulls, and how clean the final design looks.
Professional digitizers vary stitch angles to:
- Add depth and dimension
- Prevent long stitch runs
- Reduce fabric distortion
- Highlight specific design elements
Changing stitch direction subtly can make a flat design look more dynamic and premium.
Creating Smooth Stitch Flow
Good stitch flow ensures the embroidery machine moves logically through the design. Poor stitch sequencing causes unnecessary jumps, trims, and thread breaks.
Advanced digitizing focuses on:
- Logical start and end points
- Minimizing trims
- Reducing jump stitches
- Maintaining smooth machine movement
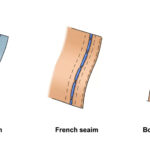
Advanced Underlay Techniques for Better Stitch Quality
Underlay stitches are the foundation of professional embroidery. Beginners often underestimate their importance, but professionals know that underlay determines stability, coverage, and durability.
Using Multiple Underlay Layers
For dense designs or difficult fabrics, professionals use multiple underlay types, such as:
- Edge run underlay for sharp borders
- Zigzag underlay for stability
- Tatami underlay for full coverage
Layering underlay correctly prevents fabric shift and improves top-stitch appearance.
Fabric-Specific Underlay Choices
Advanced digitizing adapts underlay to the fabric:
- Light underlay for thin fabrics
- Strong underlay for knits and fleece
- Specialized underlay for caps and structured garments
Density Control and Stitch Optimization
Avoiding Over-Digitizing
One common professional mistake is over-digitizing using too many stitches. Excessive density leads to:
- Stiff designs
- Thread breaks
- Needle damage
- Fabric puckering
Advanced digitizing balances stitch density to achieve full coverage without overloading the fabric.
Adjusting Density by Design Area
Professionals adjust stitch density based on:
- Stitch type (satin vs fill)
- Design size
- Fabric thickness
- Thread type
This fine-tuning creates smoother embroidery with better longevity.
Pull Compensation and Push Compensation
Fabric naturally pulls and pushes during stitching. Advanced digitizing accounts for this movement using compensation techniques.
Pull Compensation
Pull compensation slightly extends stitch edges to counter fabric pull-in, keeping shapes crisp and borders clean.
Push Compensation
Push compensation reduces excess bulk where stitches stack up, especially in dense fill areas.
Professionals adjust these settings carefully to maintain accurate design dimensions.
Advanced Satin Stitch Techniques
Satin stitches are common in logos, lettering, and borders, but they require precision.
Controlling Satin Width
Professional digitizers avoid overly wide satin stitches, which can cause:
- Thread looping
- Poor coverage
- Stitch instability
Wide satin areas are often split or converted into fill stitches for better performance.
Using Split Satins and Pattern Satins
Advanced techniques include:
- Split satin stitches for wide columns
- Patterned satin stitches for decorative effects
- Variable stitch length for smoother curves
Small Text and Detail Optimization
Small lettering is one of the biggest challenges in embroidery.
Advanced digitizing techniques for small text include:
- Using run stitches instead of satin
- Increasing stitch length slightly
- Simplifying letter shapes
- Adjusting underlay to reduce bulk
These methods ensure text remains readable even at small sizes.
Color Management and Smart Sequencing
Reducing Color Changes
Professional digitizers sequence designs to minimize color changes, saving production time and reducing thread waste.
Managing Color Blends
Advanced software allows for:
- Gradients using stitch density variation
- Color blending with overlapping stitches
- Strategic stitch direction for shading effects
These techniques elevate embroidery from basic to artistic.
Cap and 3D Puff Digitizing Techniques
Cap Digitizing
Caps require special digitizing approaches due to curvature and limited sewing fields. Advanced techniques include:
- Center-out digitizing
- Proper underlay for structured caps
- Strategic stitch angles
3D Puff Digitizing
3D puff embroidery demands:
- Wider satin stitches
- Increased density
- Special underlay settings
- Clean entry and exit points
Only advanced digitizing ensures professional 3D results.
Testing, Editing, and Refinement
Professional digitizers always test stitch files before production. Advanced digitizing involves:
- Running sample stitches
- Adjusting density and compensation
- Refining stitch paths
- Optimizing for different fabrics
Testing is where good designs become great.
Staying Ahead as a Professional Digitizer
Advanced digitizing for embroidery is a continuous learning process. Professionals stay ahead by:
- Practicing on complex designs
- Learning new software features
- Understanding machine behavio
- Studying fabric and thread interactions
The more control you have over your stitches, the higher your embroidery quality will be.
Final Thoughts
Advanced digitizing techniques give embroidery professionals the precision, consistency, and quality needed to stand out in a competitive market. From stitch direction and underlay mastery to density control and fabric-specific adjustments, these skills transform ordinary designs into professional-grade embroidery.
For businesses and creators who want expert-level results without managing complex digitizing themselves, Absolute Digitizer provides reliable, high-quality digitizing services tailored for professional embroidery needs.